Whether you’ve been a Salesforce admin for ten years or ten days, I’m pretty sure you’ve got some pet peeves. No system is absolutely flawless, and there will always be little things that drive us absolutely nuts as we do our jobs.
Over the years, many of my pet peeves have been solved by Chrome extensions. I even wrote a blog post – ages ago – about my favorite! That’s right, just one – because back then, there were maybe half a dozen Chrome extensions for Salesforce. Now there are just tons of them, so I wanted to share my old and new favorites. I hope you find them as useful as I have!
But first…
Browser extensions may not be secure. Every extension you add has the potential to expose your Salesforce data, your browsing activity, your browsing history, and more. Data mining, identity theft, and malicious attacks can be done through even the most harmless extension. Although Google is very quick about removing extensions from the Chrome web store as soon as a problem is detected, you should do all you can to prevent a security breach. These security best practices can help you avoid malicious attacks from browser extensions:
- Make sure your browser is consistently updated and patched.
- Have an antivirus that protects your browser, not just your computer.
- Keep your browser plugins and extensions updated.
- On a regular basis, remove plugins and extensions that are no longer necessary.
- Do not save any personal info via your browser (passwords, credit card info, etc.).
- Read the reviews before you add a new extension! If it’s brand spanking new, I like to let other people be the guinea pigs and wait until there are some good reviews before I commit to it.
- Use Extension Defender or a similar tool to scan your extensions for unwanted or malicious apps.
Your Salesforce data is particularly sensitive. Many organizations will not allow browser extensions due to compliance regulations. Before you add any extension to your browser, you should 1) be aware that it may expose your org’s Salesforce data to third parties, and 2) make sure that you are not breaking policy by doing so. During the addition of a new extension, you are warned of these dangers:
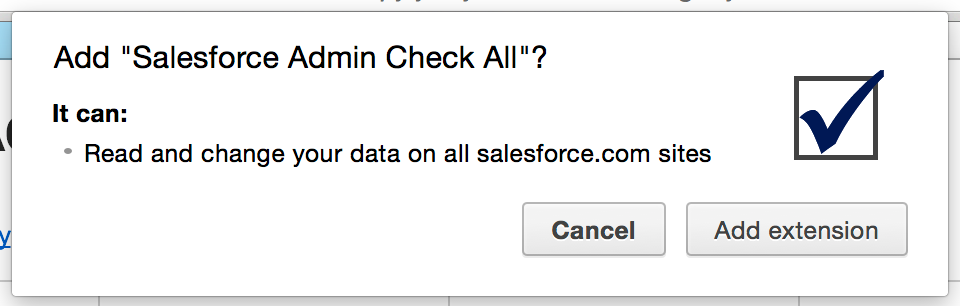
You can also view this information by click the “Permissions” link under each extension in the extensions list in your Chrome settings.
If security is enough of an issue that you are not able to add extensions, I recommend looking for comparable apps on the AppExchange. For example, the Excelist app – which will most likely meet the most strict security regulations – is an excellent substitute for the Salesforce Data Exporter extension.
Okay, now the fun stuff!
Now that I’ve rained all over your parade with security warnings – here are some of the Chrome Extensions that I find the most useful.
Sandbox Favicons
Ever have too many tabs open, and have trouble finding production vs. sandbox? This extension adds a little “S” to the cloud favicon to make it more obvious which of your tabs are sandbox instances.
Colored Favicons
Like the sandbox favicons? This extension takes it a step further and applies a different color to the cloud favicon for each instance.

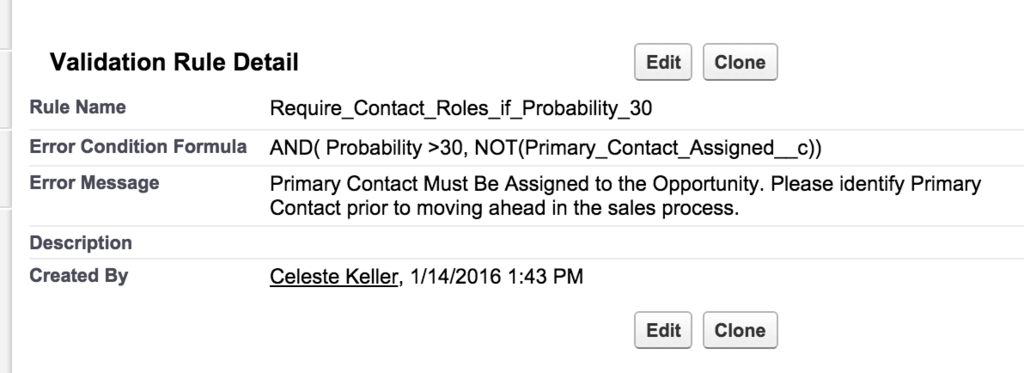
Enhanced Formula Editor
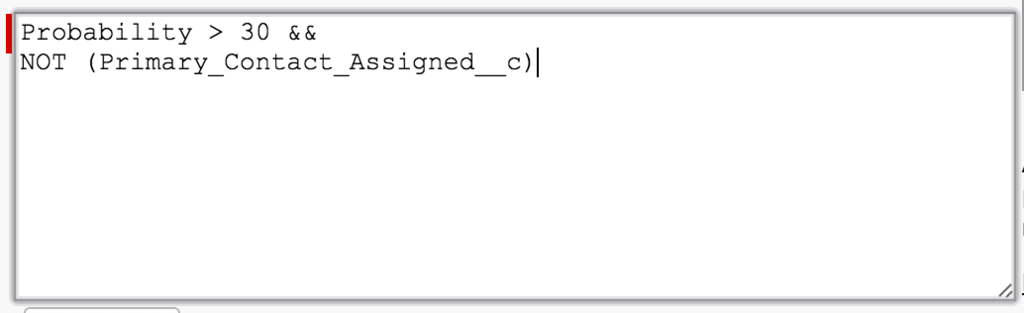
This extension gives you all kinds of bells and whistles for writing formulas, such as syntax highlighting, tabbing, parenthesis matching, and find and replace. Example: here is a normal validation rule formula:
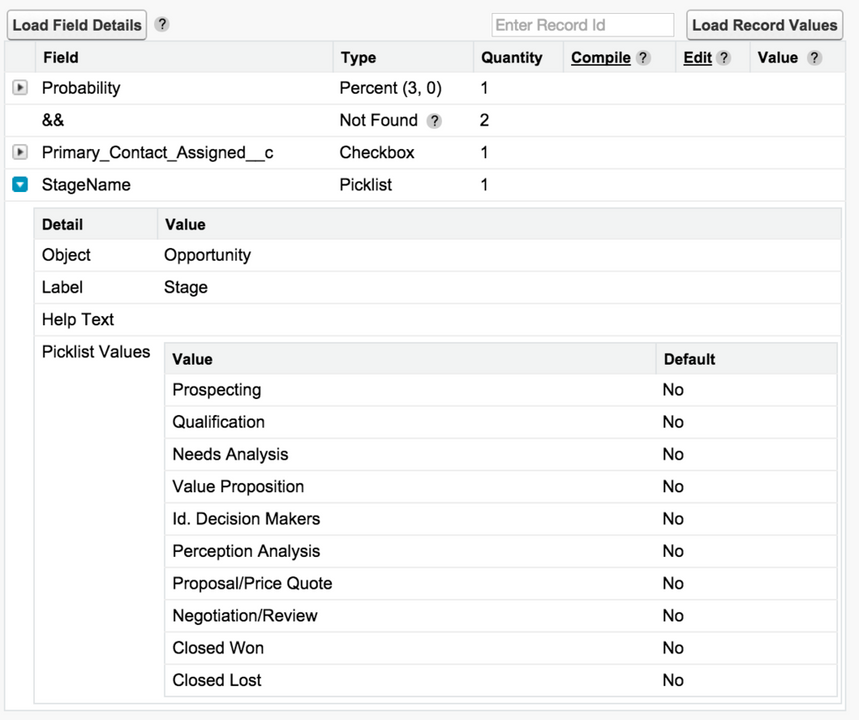
Here is that same formula with the Enhanced Formula Editor extension:
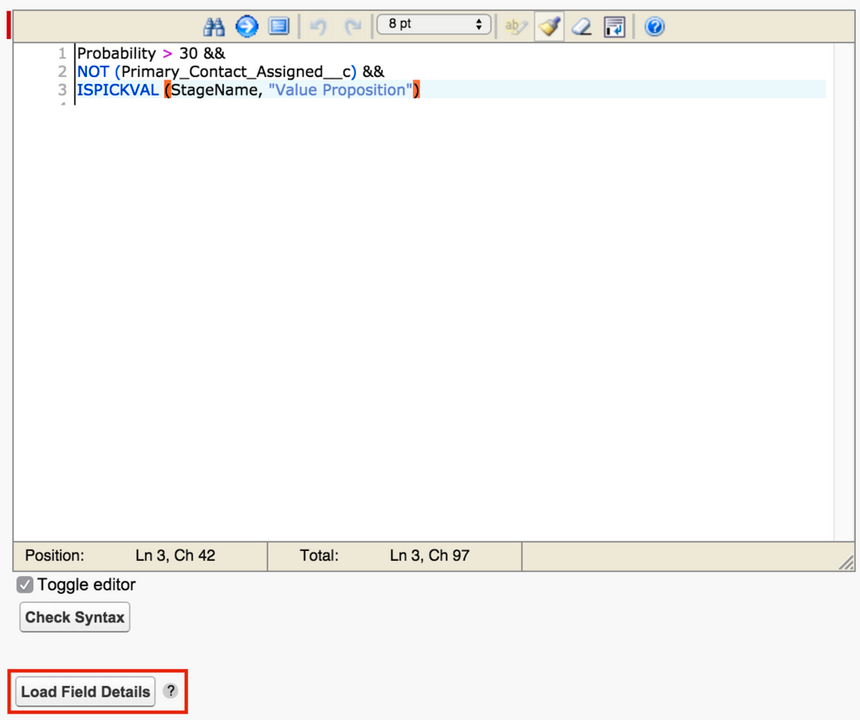
As if that were not enough, there is a new button called Load Field Details that will show you additional info about the fields in your formula – such as help text, picklist values, and formulas (for formula fields).
Change Set Assistant
Ever try to quickly find custom fields – or, well,anything– to add it to your change set? I swear, it’s almost enough to make me recreate things in production manually. This extension gives you the ability to filter by object (for object-specific components), to show all options on one page, and to search for something specific.

Note: There is also an extension calledBoostrwhich handles the change set issue, and the search setup issue, and a few other things as well. If you wanted at least those two extensions, you can just get this one and kill a whole nest of birds with one stone.
Data Exporter
Don’t you wish you could export list views into Excel? Well, wish no more. This extension adds a handy “Export to CSV” button to all of your list views.

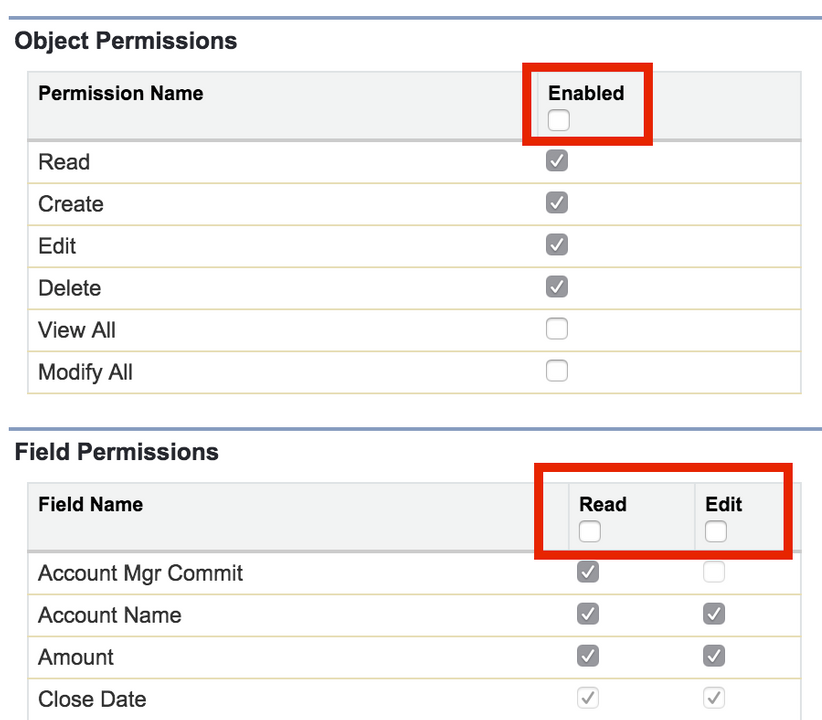
Admin Check-all
In profile object permissions, one of my pet peeves is that there is no option to check all boxes for field access. Another problem solved by an extension! This one adds the ability to select all boxes anywhere that it did not exist before.
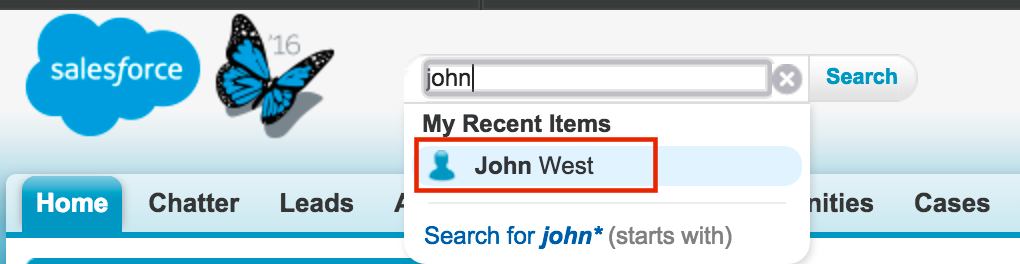
Go Directly to User
I know it’s only an extra two clicks, but still – ever since Chatter was born, it has been two extra clicks to get from a user’s Chatter profile to their user record.
This extension will take you directly to that user record from your search results, or from the link in your Recently Viewed Items list (in the left-hand navigation menu). Downside: if you are clicking in the “My Recent Items” list from the global search, you will still go to the Chatter profile of the user.
Enhance Salesforce Header
In the average org without a Community, your header has a Setup link, and another for Help and Training – but you still have to click onto your name to get to your Profile, Settings, or Developer Console.

And if you have one or more Communities enabled, it’s even worse.

This extension displays all of those links at the top of the page, and also the type of instance (production or sandbox), the current time, and your org name. It can get a little crowded, but if you are looking to save clicks, it’s perfect!

I hope you find this list useful in your admin work! Feel free to comment with your own favorite extensions.
Disclaimer:I do not profit from any Chrome extensions, or AppExchange apps. This post is intended to showcase things that I find useful, but I do not vouch for the security of any of them. Add Chrome extensions at your own risk.